Wednesday, August 17, 2011

Our Pint-sized Playroom...

I had a few "love at first sight" moments with our house, and the itty-bitty room next to the kitchen was one of them.  Although it was an office when we saw it, the room had originally been added on by the first owners as an extra sleeping space for one of their sons.  I saw it and knew it would make a perfect playroom!

I knew this space would be full of multi-colored toys and lots of bright accents, so I decided to ground everything with lots and lots of white.  The walls and trim got several coats of Sherwin Williams' "Snowbound".  Then Justin and I built a platform for a twin-sized mattress, and I upholstered the front panel in an awesome orange and white fabric that I have been holding on to for the last 3-4 years (it's called "Dawson's Dot" from Hancock Fabric's long ago discontinued Laurie Smith collection).   Then came a plain white blanket and lots of pillows (more on those later).  Now the kids have a place to read, and we have an extra bed for guests.

Next came storage, because this little room would need a lot of storage.  One corner of the room already contained a tall, built-in cabinet unit and a small nook with some wire shelves.  I repainted the doors of the built-in unit with chalkboard paint and Justin helped me add new shelves inside so the kids' toys would fit.  Then we removed the wire shelves and built wooden ones in their place.  We also added hooks below the lower shelf so the girls would have a place to hang their dress-up clothes.

Since 3 kids use a lot of toys, we knew we needed to add even more storage.  We bought a 9-cube organizer and a 6-cube organizer from Martha Stewart's line at Home Depot, and then put them beside each other on the open wall (and since my kids often think they are monkeys, both shelving systems are securely attached to the wall).   Then a storage bench we built a few years ago got a make-over with some striped scrapbook paper and found a new home under the window. 

Finally, we needed to add some color to our extremely white room.  I originally wanted to use wooden letters to make the alphabet border that runs around the top of 3 of the walls.  I realized that $6/letter multiplied by 26 letters equalled major bucks, and decided to find another option.  I found a set of "This Land Alphabet Wall Cards" from Land of Nod, and couldn't be happier with them!

Next came the fabrics.  I wanted short curtains (because of my little "monkeys"), so I chose to make them myself.  I picked a really graphic Thomas Paul print ("Silhouette" in turquoise) and added a little orange rick-rack trim near the bottom and some orange grosgrain ribbon ties at the top.  After curtains, it was time for pillows for the bed area.  I found two really soft, fuzzy cream colored pillows at Target. Then I made two large 18" x 26" pillows from the "Dawson's Dot" fabric, two smaller 20" x 20" pillows from "Silhouette" in kiwi with purple pom-pom fringe.  It still didn't look inviting enough so I made 2 more pillows: a 20"x 20" from some cream-colored cotton that I added stripes of rick-rack trim to the front of and another smaller one made from the curtain left-overs with yellow pom-pom fringe.  Finally I covered some of the cubes we'd bought for the shelves with more of my left-over fabrics and a coordinating color of rick-rack trim.

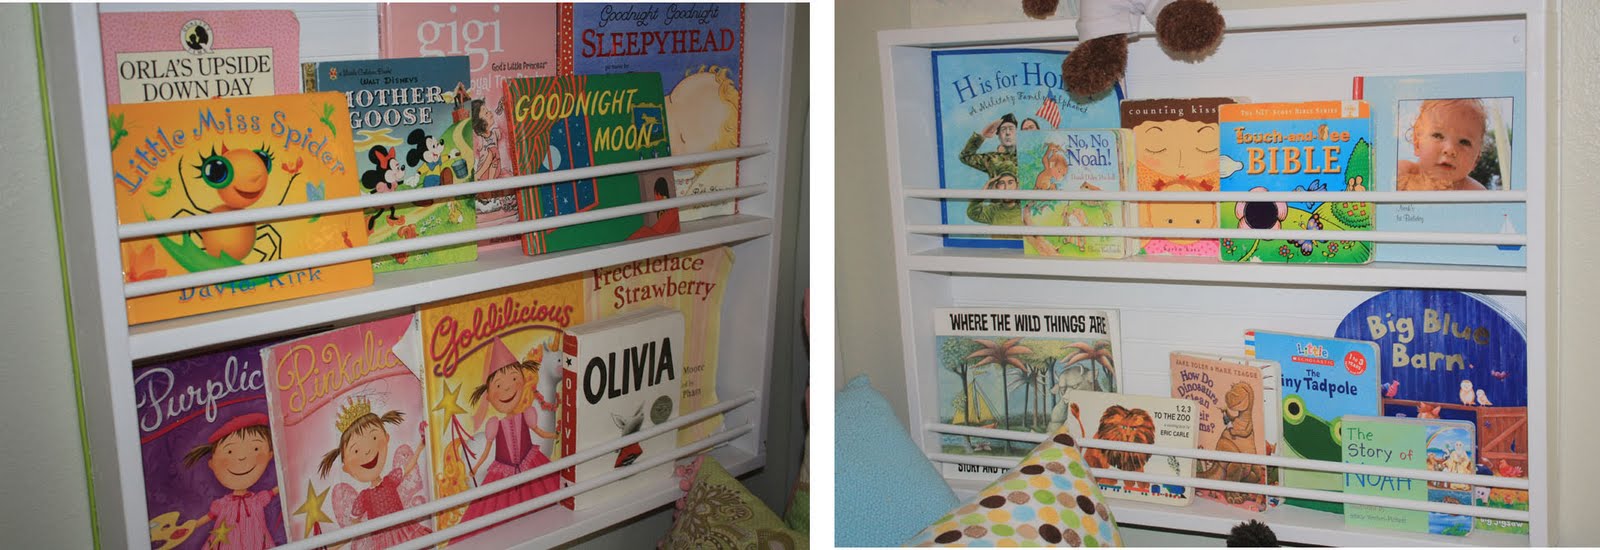
I started filling the shelves with toys and books.  The things that the kids played with everyday went into the fabric-covered cubes.  Then some of the girls' stuffed animals, Noah's cardboard books, and an assortment of tin lunchboxes filled the open cubbies.  An awesome "Bulletin Board Lamp" (also from Land of Nod) went on top of the cubbies, along with a globe and a Fisher Price "Roly Poly Chime Ball" from my childhood.  Noah's cars and trucks went into the empty spaces on the storage bench.  The shelves above the dress-up hooks hold more books, a basket filled with chalk and erasers, and one of Maddie's old "Madeline" dolls.  The openings above our new chalkboard hold a few more sentimental toys:  my old Fisher Price telephone, a baby-doll sized Radio Flyer wagon, a couple more stuffed animals, and 2 sets of nesting dolls that Justin bought in Russia during his Navy days.

After looking at the playroom for a few days, I decided I wasn't quite finished. The corner that held the built-in cabinet and shelves still looked a little bare compared to the rest of the playroom.  I started with the empty, white wall that ran behind the room door and next to the chalkboards.  Since was a fairly small wall, and most of it was hidden while the door was open, I decided to try wallpaper.  I checked all of my local home improvement stores but couldn't find any in stock wallpapers that I liked.  I had pretty much given up on the idea until I found some Hobby Lobby wrapping paper in the exact same striped pattern as the scrapbook paper I'd already used on the storage bench.  After one roll of wrapping paper, a jar of Mod-Podge, and a lot of patience, the wall was no longer bare or white.  The small wall on the other side of the chalkboard cabinets got a trio of clocks. One is labeled with our time and the other 2 are for family members who live in other time zones.  The final addition to this area is a growth chart made from a wooden, folding carpenter's ruler (found on clearance sale from Pottery Barn, of all places) attached to the wall so I can keep track of how fast the kids are growing. 

This room is definitely tiny, but we've managed to pack a lot into the space (I think I forgot to mention that it's only about 70 square feet).  It's bright and fun and welcoming and my kids absolutely love it.  I think it may even be my favorite place in the house, too!

Monday, August 8, 2011

Bella and Noah's shared space...

In honor of Noah's second birthday earlier this week, I decided this post would focus on the bedroom he shares with his 4-year old sister Bella.  Since these living arrangements will probably only work for the next few years,  I wanted to make sure that the current decor "fit" the two of them but was also easily changable and relatively inexpensive.


It took me a little while to choose what color I wanted to use in Bella and Noah's room. I finally decided that even though green is the typical "go-to" color for gender neutral things, it did give me the most flexibiltiy.  The walls in their room were already painted a mossy green when we bought the house, but it wasn't quite the shade I wanted to use.  I painted quite a few sample squares of various greens on the walls before I settled on one called "Bare Branches" by Sherwin Williams (it's actually part of their now-discontinued Martha Stewart collection, but the formula was still in the computer when I asked).

Even though I wanted some aspects of their two sides to be the same, I didn't want Noah's side to mirror Bella's side completely. I knew the biggest matched item would be their beds. Since I wanted to keep expenses down, I started searching for a matching pair of secondhand beds.  Several weeks of stalking Craigslist (and all of the garage sales within 30 miles) left me empty-handed and disappointed.  After a bit of brainstorming, I decided to change my plans and jump on the DIY-upholstered headboard bandwagon.  My staple-gun and I have taken on our fair share of smaller projects, but the idea of headboards was a bit daunting.  I kept it simple and went with plain rectangle shapes and no extra detailing, but I am pretty happy with the way they turned out. 

Noah only had a couple months left in his crib, so I started work on Bella's side first. I broke a few of my "rules" while working on her bedding.   I usually refuse to buy multiple pieces of a set and I don't normally go for cartoon characters or animals in kids' rooms, but Bella fell in love with the Circo "Love 'N Nature" collection at Target. Since I have a major soft spot for owls (and birds in general), I gave in. We bought the quilt set, the coordinating sheets, an amazingly cute owl pillow, a canvas owl print, and an awesome tree lamp.  Once we made it home, I added in a few extra pillows that were left-over from Maddie's bedroom makeover.  Next, partly because I have an addiction to vintage (particularly mid-century) chairs and not enough places to put them all, I sat a fantastic Gunlocke chair next to the foot of her bed.  I scored this chair for free from a family member and had originally planned to try to refurbish it to use in our bedroom someday, but the awesome persimmon-colored leather looked so great in there that I changed my mind.

Finally Noah was ready for his "big boy" bed, and I could begin working on putting their room together.  I started with a khaki and brown plaid comforter, since it used two of the more dominant colors from Bella's bedding and went well with the headboards.  Next I needed some color to compete with the pinks, greens, yellows, and oranges that were also in Bella's bedding.  I had some trouble until I came across a favorite baby blanket that I was having trouble getting rid of, one side was a grid of brown, blue, yellow, and green dots and the other was a super-soft solid electric blue.  It was perfect, so I very carefully took the blanket apart and used the separate pieces of fabric to make two large pillows!  Then, because I still rock my "baby" every day, I brought his rocking chair back in and put it near the foot of his bed. 


All of my kids are avid readers, and I really wanted Noah and Bella to have some of their books where they could get to them easily.  I'd seen a few wall-mounted bookshelves online that would have fit perfectly next to their beds, but the prices were all a little steep.  Justin and I decided it was time for another weekend DIY project and built our own using some beadboard, pine 1 x 4's, and wooden dowels. 

Their room was now looking more like two distinct half-rooms than the cohesive whole that I had originally envisioned.  I placed my grandfather's dresser in the space between the two headboards, then stood back and contemplated the empty wall above.  I really wanted something that tied both the sides together, but had no idea what.  After a few days, I realized that a collection of things might work better than one large something.  Bella's side was easy: birds, owls, birdhouses, and flowers all worked well with her bedding and her personality.  Noah's side took a little longer, but I finally settled on a bit of a tribute to Justin's time in the Navy (and mixed in a few airplanes, since both father and son love them). 


Now Noah and Bella's shared bedroom is cute, sweet, and ready to grow and change as time passes by...just like them!

Thursday, July 28, 2011

Our hallway...

Before we started looking at houses, we made a list of things that were important to us.  At the top of my list was the floorplan, especially the location of the bedrooms.  I know that "split floorplans" are really popular (and have been for a while), but I am not a fan.  I may change my tune once my kids are older, but for now I am much more comfortable knowing that I can see and hear them from my bedroom. 

We ruled out a lot of potential houses on floorplan alone.  Having all three bedrooms off of one central hallway was a huge positive for this house...the fact that the hallway looked like it did was a major negative.


Getting rid of the funky, textured wallpaper was our first challenge.  It was tougher (and messier) than  I expected, and so I had to call in some reinforcements.
Maddie and Bella help out with the wallpaper while Noah is napping!
We decided to remove the door that separated the hallway from the living room. The hall instantly seemed twice as wide, and much brighter. A new light fixture added even more light. Then the old wood paneling and all the moulding became a clean, fresh white ("Snowbound" from Sherwin Williams) and the upper walls got a couple coats of silvery gray (SW's "Repose Gray").  Replacing the tile floor is on my "someday" list, but tiling the entry way myself convinced me to leave this job until I can afford to hire a professional! 


I've always wanted a designated place to put up family photos and the long, bare walls in this hallway gave me the perfect spot.  Now I have a showcase for our favorite portraits, snapshots, and even a few of my favorite drawings from the kids.


Our hallway is not just a way to get from "point A" to "point B" anymore, it's also a sweet little trip down "Memory Lane".

Wednesday, July 13, 2011

Our entry: A better first impression...

When we knocked on the front door of what became our new house for the first time, I was really excited about what could be inside.  Being greeted by a blank tan wall and some awful brownish-colored tile was a little of a disappointment. We could tell from the minute we walked in that there was work that needed to be done.


I've heard the phrase "You never get a second chance to make a first impression," but I'm just not sure that's true. Our entryway definitely got a new life after some paint, accessories, and an amazing new marble floor.

The decision to replace those mottled, brown floor tiles was an easy one...the process was not. The demolition was too much to handle on my own, especially since I couldn't use a sledgehammer inside during naptime (yes, I did try it once...let's just say that it wasn't my best idea).  I enlisted the help of my wonderful husband, Justin.  He spent hours and hours breaking and removing that old tile.

I had fallen in love with a marble and glass mosaic tile from Lowe's and had been dying to use it somewhere. Even though I knew that it was too pricey (and not durable enough) to use as flooring, I still really wanted to try it out.  After some discussion, we decided to use a much cheaper tile as the main flooring and use the mosaic as a border around the edges.  I searched and searched until I found 12" x 12" Carrera Marble tiles on sale at a flooring liquidator in a nearby city for under $3 each.  After a weekend of laying tile and a few phone calls to my brother Jason (who has some professional tiling experience ), my new floor was complete...and gorgeous! 
 
After tiling the floors, I painted 2 of the walls a charcoal gray color that matched the dark gray tiles from the mosaic (Sherwin Williams' "Grizzle Gray").  I decided to remove the old, beat-up wood blinds from the front door, and add some translucent window film for privacy.  Then I cut a 1-inch wide strip off around the edges of the film so I could still see any visitors clearly. 

Finally, I took on a few more naptime DIY projects to finish things off.  A freshly repainted, vintage mirror was strategically placed to reflect some of the light from the living room windows and brighten up the entry area.  A black and white bird print that I saved from my grandmother's trash pile and reframed found a new home on one of my floating shelves.  Next to it sits a ceramic piece that I salvaged from a broken lamp and painted yellow.   I also put up a few antique cameras that were garage sale finds.

Now I just wish someone other than the pizza delivery guy would use my front door...

Sunday, July 10, 2011

Maddie's pink pad!

When we decided to buy our new house and move across town, Maddie got very upset. She loved her school and did not want to leave her friends behind. We made a deal: in exchange for having a positive attitude about the new house/neighborhood/school/friends, Maddie would get HER OWN ROOM!  {Bella and Noah were young enough to share a room for a few years, at least.}


{this was taken before we moved in}


Before we moved in, we painted the kids' bedrooms. Maddie chose a pale-ish pink (Behr's "Scented Valentine"), and even got to help paint. She got two new-to-her beds (matching twin sized antique beds that my mom had bought at an auction years ago and never used) and matching comforter sets in a hot pink and white damask print. She was thrilled with the results, until we finished re-doing the kids' bathroom.

Maddie had fun helping me choose fabrics and accessories to use in their bathroom, and now she wanted to do something special to her bedroom, too. Since her eighth birthday was coming up, we agreed on a "bedroom re-vamp" as her gift from mommy and daddy. She was pretty specific about what she wanted: canopies, a new desk, and lots of pillows!

We chose to start with the pillows, and headed to the fabric stores.  Maddie is a major girly-girl, so we picked mostly flowers and polka dots, with a little bit of sparkle thrown in.  After a few nap-times worth of sewing, her beds were both overflowing! {The sequined "M" pillow came from Santa.}

The dresser is another one of my mom's antiques. Maddie didn't like the original brown wood finish, so we decided to paint it. We took our favorite piece of pillow fabric with us, and went to every paint store trying to match the beautiful shade of blue in it. I finally found Benjamin Moore's "Robin's Nest", and we fell in love! The dresser came out beautifully, and I am really pleased with it.
 
After finishing the dresser, we moved on to the desk. I searched garage sales and Craigslist for weeks trying to find something that fit the small space between her beds. After a lot of disappointment, Justin suggested that we just try to build a desk ourselves. We started at Home Depot and bought 2 table legs, a piece of plywood, and some pre-cut plexi-glass. With Justin's help, I built the desk to mount onto the wall in the back. Then we framed out the edges with some moulding that we found in our attic, and I painted it a combination of white and "Robin's Nest". Her chair was yet another hand-me-down, the desk chair that both my mom and I had used as children. It received a couple coats of "Robin's Nest" and a new seat cushion that I made out of left-over pillow fabric.

The canopies were made using simple, sheer curtains that were left behind by the previous owner..all I did was sew some hot pink ric-rac trim to the edges. Then we built the frames out of wooden shelf brackets and some scalloped moulding from Home Depot, painted them white, and hung them above her beds.

Finally it was time for the finishing touches. A nickel lamp and a nightlight that weren't being used got simple shade make-overs with some grosgrain ribbon. We used more ribbon to hang paper lanterns, DIY tissue paper pom-poms, and DIY tulle pom-poms above her desk. Wall letters covered with scrapbook paper make sure everyone knows exactly who the room belongs to. Our interpretation of butterfly collection (re-painted garage sale picture frames, left-over scrapbook paper, and a set of plastic white butterflies from Target) dresses up the long, empty wall above Maddie's bed.


Maddie and I had so much fun working together on her room that we're already coming up with new projects...little things to add in the future to make it even more "her". 

Wednesday, July 6, 2011

Bright, happy bathroom...

The kids' (and guest) bathroom was one of the first spaces we worked on. It was embarassing: small and dark and dull. The "small" part was out of my hands, but I'd decided that the days of "dark and dull" were coming to an end.


The white tile on the floor and countertop were in good shape, and worked with the new color scheme, so we kept them. The mirror was also going to stay, at least until I could find a better one for a good price. The toilet and tub stayed, as well.  I'll admit that the bathroom is a bit on the girly side right now, but we'll be able to change things pretty easily once Noah grows up enough to mind.


The first thing we did was take away the door separating the two areas. It made a huge difference in the way the room looked (and made it much easier to move around when "bath time" came, too).  

Next it was time to re-paint. The girls chose "Glad Yellow" from Sherwin Williams...the name sounded perfect, but the color was a bit on the bright side. We decided to tone it down with some white beadboard around the bottom half of the tub/toilet area, white trim/moulding everywhere, and a white cabinet under the sink.

Instead of putting a towel bar above the toilet, we placed 3 nickel robe hooks within arm's reach of the tub.


Now it was time for the finishing touches.  I found two fabrics I loved from Hobby Lobby ("Serendipity Stripe" and "Serendipity Paisley") along with an adorable, wide ric-rac trim and smaller grosgrain ribbon in "Shocking Pink". I made the shower curtain first, then used the left-overs to embellish a few hand towels, the wastebasket, and a step-stool for the sink. Next came the set of orange and green mirrors that I bought on clearance from Target. A little craft paint on the frames and now they fit in perfectly, too.


My last project is one of my favorite parts of the kids' bathroom. First I painted 3 Target clearance-aisle picture frames with the same craft paint used on the mirrors. Then I framed a picture of each of my kiddos as babies in the bath. I mounted the frames on some extra beadboard, and then hung each on the wall with a ribbon. Voila!


Finally, the kids' bathroom was finished (until I find that "perfect" mirror, that is). It's a bright, happy, kid-friendly place that we all love!

Our starting point...

I fell in love with our house pretty much instantly.  My husband did not.  When he looked around during our first showing he saw dark rooms, ugly brown wood everywhere, mismatched floors, and some weird brick thing in the living room corner.  I, however, saw potential everywhere I looked.  This house had so much good in it...a floorplan that really worked for us, a neighborhood we loved, a great big backyard for the kids...and I had no problem imagining what a little paint, some fabric, and new lighting would do for the rest of it.

This post is all about what our "home" started out as...


Kitchen

Dining area

Living room

That "weird brick thing in the living room corner"

Hallway leading to bedrooms

Maddie's room

Bella & Noah's room

Kids' bathroom sink area

Kids' bathroom tub area

Master bedroom

Master bathroom

Future playroom


*I apologize for the horrible hodge-podge of pictures.  Some came from the original listing online, some were taken really quickly and while trying to wrangle the kids during our first showing, and one was even taken during our "cleaning day" before we moved in. *